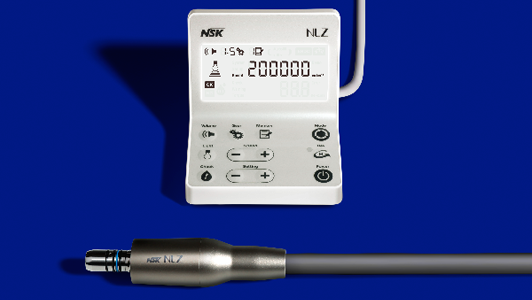
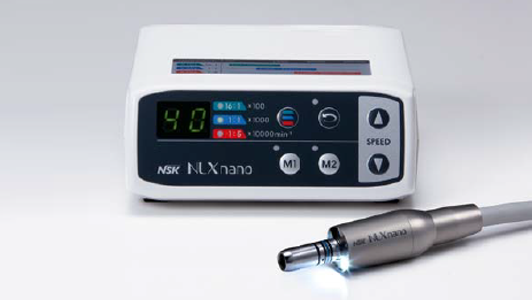
NLZ E / NLZ
QWarning: HE1 – If you continue to use a contra angle that was determined to be “NG” or “OIL” when the contra check function was performed, the contra heat prevention function will be activated and “HE1” will be displayed. - TS22460
A
- Action
-
Perform maintenance of the handpiece and then check the handpiece with <Contra-Check> function.
QWarning: HE0 – Overload or a risk of abnormal heating of the motor detected. <Motor overheat prevention function> * - TS22710
A
- Action
-
Avoid overloading the handpiece with heavy cutting, etc. and wait for the warning to disappear.
* If you continue using the product, the motor will stop and error code “E8” will be displayed.
QError Code: E0 – The motor shaft is locked. - TS22712
A
- Action
-
Check if the handpiece is connected properly.
QError Code: E1 – Over current in the circuit detected. - TS22714
A
- Action
-
Avoid overloading the handpiece with continuous heavy cutting, etc.
Press the foot pedal again to remove the error.
QError Code: E2 – Higher motor speed than rated value detected. - TS22716
A
- Action
-
Avoid overloading the handpiece with continuous heavy cutting, etc.
Press the foot pedal again to remove the error.
QError Code: E3 – The Motor drive IC (Integrated Circuit) chip on the board that controls the motor- has generated an error signal. - TS22718
A
- Action
-
Avoid overloading the handpiece with continuous heavy cutting, etc.
Press the foot pedal again to remove the error.
QError Code: E4 – High temperature of FET detected. - TS22720
A
- Action
-
Allow the unit to cool down and try again.
QError Code: E5 – Overvoltage input to the unit detected. - TS22722
A
- Action
-
Check proper connection of AC adaptor and AC power cord.
QError Code: E6 – Overvoltage of an LED light detected. - TS22724
A
- Action
-
Check the LED light connection.
QError Code: E7 – Detected a residual overvoltage when the motor was started. - TS22726
A
- Action
-
Wait for approx. 5 sec., then press the foot pedal again.
If the error does not disappear, check if the motor and motor cord are connected properly.
QError Code: E8(1) – A handpiece heat generation error was detected. - TS22728
A
- Action
-
Perform maintenance of the handpiece, and then check the handpiece by the Contra- Check.
QError Code: E8(2) – A heat generation error of the motor was detected. - TS22730
A
- Action
-
Leave the motor until it cools down.
QError Code: E9 – The motor does not start up. - TS22732
A
- Action
-
Check the motor connection.
QError Code: EC – Data cannot be saved to EPROM (Memory). - TS22733
A
- Action
-
Turn the power OFF and then ON again.
QError Code: ED – Signals from the sensor cannot be read. - TS22737
A
- Action
-
Check the connection of the motor to motor cord.
QError Code: EE – An Increased handpiece heat generation error was detected. - TS22739
A
- Action
-
Perform maintenance of the handpiece, and then check the handpiece by the Contra- Check.
QError Code: EF – Under-voltage input to the unit detected. - TS22741
A
- Action
-
Check proper connection of AC adaptor and AC power cord.
QThe LCD Display does not light. - TS22743
A
- Cause1
-
The power Switch is OFF.
- Action1
-
Turn ON the power.
- Cause2
-
The AC adapter or AC power cord is not connected correctly.
- Action2
-
Check the connection.
- Cause3
-
Internal Fuse is blown.
- Action3
-
Contact your Authorized NSK Dealer.
QThe motor does not run. - TS22745
A
- Cause1
-
The tubing, motor cord, AC adapter or AC power cord is not connected correctly.
- Action1
-
Check the connection.
- Cause2
-
The air pressure is not given, or not connected properly from the dental unit.
- Action2
-
Check the air pressure of the dental unit.
- Action3
-
The LCD Display shows an error code.
- Cause3
-
Refer to the error code.
(Refer to “7-1 Error Code”)
QThe rotation speed of the motor does not rise. - TS22747
A
- Cause
-
The air pressure of the dental unit is lower than the “Upper limit of the air pressure”
- Action
-
Set the Upper limit of the air pressure below the air pressure of the dental unit.
(Refer to “3-10 Changing the settings for various functions”)
QBeeps continue to sound when turning ON the switch. - TS22749
A
- Cause
-
You are stepping on the foot pedal when turning on the power switch. (Safety function)
- Action
-
Do not step the foot pedal, and turn on the power switch.
QThe LED does not light. - TS22751
A
- Cause
-
End of life expectancy reached.
- Action
-
Contact your Authorized NSK Dealer.
QThe motor heats up abnormally during rotation. - TS22753
A
- Cause
-
Coolant air is not given, or not properly connected from the dental unit.
- Action
-
Check the air pressure on the side of the dental unit.
QWater leakage - TS22755
A
- Cause
-
The tubing, motor cord is not connected correctly.
- Action
-
Check the connection. If it is happening inside the control unit, contact your Authorized NSK Dealer.
QSettings when the power is turned ON are different from the previous ones when turning off the power. - TS24103
A
- Cause
-
The power is turned OFF using the main unit’s power switch.
- Action
-
Previous settings will not be retained when turning OFF the main unit’s power switch. Turn OFF using the control unit’s Power Key.
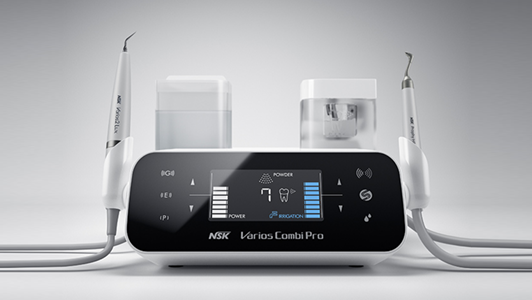
Varios Combi Pro
QBeeping sound (Ultrasonic Mode and Powder Mode) - TS18103
A
- Cause1
-
Power was turned on while the Foot Control was depressed.
- Remedy1
-
Release the Foot Control and turn the POWER switch to ON.
- Cause2
-
Abnormal heating of the Control Unit.
- Remedy2
-
Stop operation and leave until Control Unit cools.
QTouch panel does not react well or touched key is not recognized correctly. (Ultrasonic Mode and Powder Mode) - TS18113
A
- Cause1
-
Calibration is slightly misaligned due to static electricity, exogenous noise, etc.
- Remedy1
-
Turn the POWER switch to OFF and then to ON.
- Cause2
-
Key was not touched in the center.
- Remedy2
-
Touch the center of the key.
QWater does not stop / The water level cannot be adjusted (Ultrasonic Mode and Powder Mode) - TS18111
A
- Cause1
-
Damage or wear of the O-Ring.
- Remedy1
-
Follow the procedure in “10-1-5 Chamber Base Connector” to replace the O-Ring.
- Cause2
-
Foreign material has become clogged in the water line.
- Remedy2
-
Perform Auto-Cleaning. If the symptom is still not resolved, contact your Authorized NSK Dealer.
QAlarm sounds are heard, and the Ultrasonic Mode Display (P/E/G) and “ULTRASONIC” blink alternately when the Foot Control button D is depressed. (Ultrasonic Mode) - TS18072
A
- Cause
-
The sensor built in to the Handpiece Holder is dirty and mistakenly detects mounting of the Handpiece.
- Remedy
-
Wipe the sensor clean.
QNo/Poor vibration. (Ultrasonic Mode) - TS18099
A
- Cause1
-
The AC power cord plug is not connected to the wall socket or electricity is not supplied to the wall socket.
- Remedy1
-
Check the connection.
- Cause2
-
The Fuse is burned out.
- Remedy2
-
Refer to "10-5 Replacing the fuse" and replace the fuse.
- Cause3
-
The Tip is not tightened firmly.
- Remedy3
-
Rotate the Tip Wrench until it makes a click sound and cannot rotate any further. If the problem still persists, replace the Tip Wrench as it may be worn out.
- Cause4
-
Worn Tip.
- Remedy4
-
Replace the Tip.
- Cause5
-
The screw parts of the Handpiece and Tip are not clean.
- Remedy5
-
Wipe them clean.
- Cause6
-
The screw parts of the Handpiece are worn out as a result of a long time of use.
- Remedy6
-
Contact your Authorized NSK Dealer.*
- Cause7
-
Power has not been correctly adjusted for the Tip.
- Remedy7
-
Adjust the power so it does not exceed the maximum power level mentioned in Tip-Power Guide or on the Tip case label.
- Cause8
-
The Foot Control is disconnected.
- Remedy8
-
Connect the Foot Control Cord lead correctly.
- Cause9
-
Failure of vibration device in the Handpiece.
- Remedy9
-
Contact your Authorized NSK Dealer.*
- Cause10
-
Failure of internal components of the Foot Control
- Remedy
10 -
Contact your Authorized NSK Dealer.*
- Cause11
-
The sensor built in to the Handpiece Holder is dirty and mistakenly detects mounting of the Handpiece.
- Remedy
11 -
Wipe the sensor clean.
* Cannot be fixed at clinics, etc.
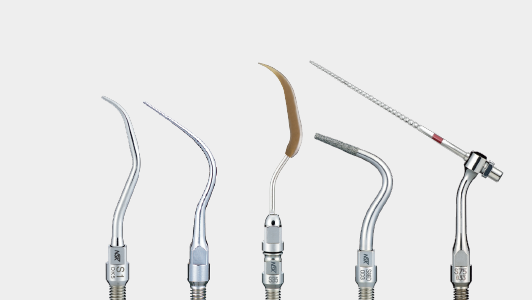
QThe Tip is bent or broken. (Ultrasonic Mode) - TS18095
A
- Cause
-
Power has not been properly adjusted for the Tip.
- Remedy
-
Adjust the power so it does not exceed the maximum power level mentioned in Tip-Power Guide or the Tip case label.
QThe Tip falls off. (Ultrasonic Mode) - TS18093
A
- Cause
-
The Tip is not tightened firmly.
- Remedy
-
Tighten the Tip until the Tip Wrench clicks.
QNoise from the Handpiece. (Ultrasonic Mode) - TS21554
A
- Cause1
-
Power has not been properly adjusted for the Tip.
- Remedy1
-
Adjust the power so it does not exceed the maximum power level mentioned in Tip-Power Guide or the Tip case label.
- Cause2
-
The Tip is not tightened firmly.
- Remedy2
-
Rotate the Tip Wrench until it makes a click sound and cannot rotate any further. If the problem still persists, replace the Tip Wrench as it may be worn out.
- Cause3
-
Failure of vibration in the Handpiece or the Control Unit.
- Remedy3
-
Contact your Authorized NSK Dealer.*
* Cannot be fixed at clinics, etc.
QThe Handpiece is overheating. (Ultrasonic Mode) - TS21556
A
- Cause1
-
Power has not been properly adjusted for the Tip.
- Remedy1
-
Adjust the power so it does not exceed the maximum power level mentioned in Tip-Power Guide or the Tip case label.
- Cause2
-
The Tip is not tightened firmly.
- Remedy2
-
Rotate the Tip Wrench until it makes a click sound and cannot rotate any further. If the problem still persists, replace the Tip Wrench as it may be worn out.
- Cause3
-
The screw parts of the Handpiece and Tip are not clean.
- Remedy3
-
Wipe them clean.
- Cause4
-
The screw parts of the Handpiece are worn out as a result of a long time of use.
- Remedy4
-
Contact your Authorized NSK Dealer.*
- Cause5
-
The Irrigation Volume is insufficient or irrigation has stopped.
- Remedy5
-
Irrigate at an adequate volume.
- Cause6
-
Vibration failure in the Handpiece or the Control Unit.
- Remedy6
-
Contact your Authorized NSK Dealer.*
* Cannot be fixed at clinics, etc.
QNo Irrigation supply and/or unstable Irrigation supply (when using the Bottle) (Ultrasonic Mode) - TS21623
A
- Cause1
-
The Irrigation Tube is twisted.
- Remedy1
-
Straighten the twisted Irrigation Tube.
- Cause2
-
Time to replace the Irrigation Pump.
- Remedy2
-
Replace with a new Irrigation Pump (Refer to 10-2 Changing the Irrigation Pump).
QNo/Poor water supply. (when using External Water) (Ultrasonic Mode) - TS21625
A
- Cause1
-
Water is not supplied to the Control Unit.
- Remedy1
-
Check the water circuit so that water is supplied to the Control Unit. Supply water pressure: 0.1 - 0.3MPa
- Cause2
-
The Irrigation Volume is set to “0.”
- Remedy2
-
Adjust to the adequate Irrigation Volume using the Irrigation Volume setting.
- Cause3
-
Water supply may be unstable when the Irrigation Volume is insufficient.
- Remedy3
-
This is not a malfunction. Increase the Irrigation Volume in the Irrigation Volume setting.
- Cause4
-
Water Filter is clogged with foreign substances.
- Remedy4
-
Replace the water filter with a new one.
QWater leakage. (Ultrasonic Mode) - TS21627
A
- Cause1
-
The Irrigation Tube is not connected correctly.
- Remedy1
-
Firmly insert the Irrigation Tube all the way into the Irrigation Connector.
- Cause2
-
O-Ring at the Handpiece Cord is worn or damaged.
- Remedy2
-
Replace with a new O-ring by following the procedures in "10-1-1 Handpiece Cord."
- Cause3
-
The water circuitry in the Control Unit is damaged.
- Remedy3
-
Contact your Authorized NSK Dealer.*
* Cannot be fixed at clinics, etc.
QHandpiece LED does not illuminate. (Ultrasonic Mode) - TS21629
A
- Cause1
-
The Handpiece is not connected to the Handpiece Cord correctly.
- Remedy1
-
Firmly insert the Handpiece all the way into the Handpiece Cord.
- Cause2
-
Failure in the Control Unit.
- Remedy2
-
Contact your Authorized NSK Dealer.*
* Cannot be fixed at clinics, etc.
QAlarms are heard, and “POWDER” and the tooth icon blink alternately when the Foot Control button D or B is depressed. (Powder Mode) - TS21631
A
- Cause1
-
The sensor built in to the Handpiece Holder is dirty and mistakenly detects mounting of the Handpiece.
- Remedy1
-
Wipe the sensor clean.
- Cause2
-
Chamber is not attached securely.
- Remedy2
-
Attach the Chamber securely until the confirmation sound is heard.
QConfirmation sound cannot be heard, or the icon that indicates Prophy Mode or Perio Mode is not displayed when the Chamber is attached. (Powder Mode) - TS21633
A
- Cause
-
Failure in the Control Unit (disconnection).
- Remedy
-
Contact your Authorized NSK Dealer.*
* Cannot be fixed at clinics, etc.
QAir and powder are not supplied. Or air and powder are supplied but the pressure is not strong enough and cleaning power is also weak. (Powder Mode) - TS21635
A
- Cause1
-
The inside of the Nozzle Tip is clogged with powder.
- Remedy1
-
Replace the Nozzle Tip.
- Cause2
-
The inside of the Handpiece is clogged with powder.
- Remedy2
-
Clean the Nozzle base with the supplied Cleaning wire (small) and Nozzle end with the cleaning file.
In addition, clean the inside of the Handpiece with the Cleaning wire (large). If powder and air do not flow after being cleaned as described above, perform Ultrasonic Cleaning with warm water. (Refer to “9-2-3 Ultrasonic Cleaning.”)
- Cause3
-
The inside of the Chamber is clogged with powder.
- Remedy3
-
Remove powder from inside the Chamber by following the procedures in "9-4 Cleaning the Chamber and Hose."
- Cause4
-
Powder has partially solidified with water, etc., in the air passage.
- Remedy4
-
Remove powder from inside the passage by following the procedures in "9-2-1 Auto- Cleaning."
- Cause5
-
Powder container has been left open exposing powder to the air.
- Remedy5
-
Dispose of the powder and use new powder.
- Cause6
-
Water is mixed in supply air.
- Remedy6
-
Open the filter in the air supply circuit to drain the compressor, and check that water has not accumulated inside the air filter and compressor drain.
- Cause7
-
The VCP Element is clogged.
- Remedy7
-
Contact your Authorized NSK Dealer.*
* Cannot be fixed at clinics, etc.
QWater leaks from between the Handpiece and Handpiece Hose. (Powder Mode) - TS21637
A
- Cause
-
The O-ring is chipped.
- Remedy
-
Replace the O-ring in the Handpiece joint section, apply the supplied turbine oil and rub it in with your finger. (Refer to "10-1-2 Handpiece Hose (for Prophy use and Perio use).")
QCannot remove the Chamber because the Lock Button cannot be pressed (Powder Mode) - TS21639
A
- Cause
-
The button is locked
- Remedy
-
Follow the procedure in “Releasing the Lock Button” in “9-4 Cleaning the Chamber and Hose”
to release the Lock. If the symptom is not resolved, contact your Authorized NSK Dealer.*
* Cannot be fixed at clinics, etc.
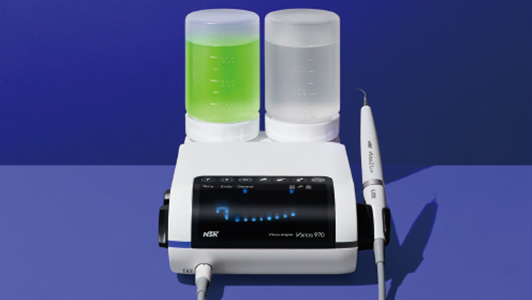
Varios 970
QNo / Poor vibration. 1 - TS21641
A
- Probable Cause
-
The Front Panel does not light, even if the Power Switch is ON.
- Cause1
-
The Power Cord or the Jack is disconnected.
- Solution1
-
Correctly insert the Power Cord or the Jack.
- Cause2
-
The Fuse is burned out.
- Solution2
-
Contact dealer.*
* Repairs cannot be made by the customer.
QNo / Poor vibration. 2 - TS21645
A
- Probable Cause
-
The Tip does not generate vibration, in spite of depressing the Foot Control
- Cause1
-
The Tip is not tightened firmly.
- Solution1
-
Tighten the Tip until the Tip Wrench clicks.
- Cause2
-
Worn Tip.
- Solution2
-
Replace the Tip.
- Cause3
-
Power has not been correctly adjusted for the Tip.
- Solution3
-
Adjust the power level on the power guide, as indicated on the Tip case label. Do not exceed the value shown.
- Cause4
-
The Foot Control is disconnected.
- Solution4
-
Connect the Foot Control correctly.
- Cause5
-
Failure of vibrator in the handpiece.
- Solution5
-
Contact dealer.*
- Cause6
-
Failure of internal components of the Foot Control.
- Solution6
-
Contact dealer.*
* Repairs cannot be made by the customer.
QThe Tip is bent or broken. - TS21647
A
- Cause
-
Power has not been properly adjusted for the Tip.
- Solution
-
Adjust the power level on the power guide, as indicated on the Tip case label. Do not exceed the value shown.
QThe Tip is flying away. - TS21649
A
- Cause
-
The Tip is not tightened firmly.
- Solution
-
Tighten the Tip until the Tip Wrench clicks.
QNoise from the handpiece. - TS21651
A
- Cause1
-
Power has not been properly adjusted for the Tip.
- Solution1
-
Adjust the power level on the power guide, as indicated on the Tip case label. Do not exceed the value shown.
- Cause2
-
The Tip is not tightened firmly.
- Solution2
-
Tighten the Tip until the Tip Wrench clicks.
- Cause3
-
Failure of vibration in the handpiece or the Control Unit.
- Solution3
-
Contact dealer.*
* Repairs cannot be made by the customer.
QThe handpiece is overheating. - TS21670
A
- Cause1
-
Power has not been properly adjusted for the Tip.
- Solution1
-
Adjust the power level on the power guide, as indicated on the Tip case label. Do not exceed the value shown.
- Cause2
-
The Tip is not tightened firmly.
- Solution2
-
Tighten the Tip until the Tip Wrench clicks.
- Cause3
-
Failure of vibration in the handpiece or the Control Unit.
- Solution3
-
Contact dealer.*
* Repairs cannot be made by the customer.
QNo Irrigation supply and/or unstable Irrigation supply (Use of Bottle) - TS21653
A
- Probable Cause1
-
The Irrigation Pump is running.
- Cause1
-
The tube twisted.
- Solution1
-
Straighten the twisted Irrigation Tube.
- Probable Cause2
-
The Irrigation Pump is stopping.
- Cause2
-
Time to replace Irrigation Pump. (Approx. 500hours after used.)
- Solution2
-
Replace with new Irrigation Pump (Refer to 11. (3) Changing the Irrigation Pump).
QNo / Poor water. (Use of External Water) 1 - TS21657
A
- Probable Cause
-
The water does not reach to the Control Unit.
- Solution
-
Check the water circuitry and supply to the Control Unit. Water pressure : 0.1-0.5MPa (1-5kgf/cm2)
QNo / Poor water. (Use of External Water) 2 - TS21659
A
- Probable Cause
-
Check to see if water reaches the Control Unit.
- Cause1
-
The Water Adjustment Knob is closed.
- Solution1
-
Turn the Water Adjustment Knob and adjust to the appropriate volume.
- Cause2
-
Disconnected Irrigation supply at low volume range. (less than 10ml/min.)
- Solution2
-
No problem. Turn the Water Adjustment Knob and increase the Irrigation volume.
- Cause3
-
The Water Filter is clogged.
- Solution3
-
Replace with new Water Filter (Refer to 11. (5) Changing Water Filter (Option) ).
QWater leakage. - TS21661
A
- Probable Cause1
-
Water is leaking from the joint between the Irrigation Tube and the Irrigation Connector.
- Cause1
-
The Irrigation Tube is not connected correctly.
- Solution1
-
Firmly insert the Irrigation Tube into the Irrigation Connector inmost.
- Probable Cause2
-
Water is leaking from the joint between the handpiece and the cord.
- Cause2
-
O-Ring at the handpiece cord is worn or damaged.
- Solution2
-
Replace with new O-Ring (Refer to 11 (2) Changing O-Ring •Handpiece Cord).
- Probable Cause3
-
Water is leaking from the Control Unit.
- Cause3
-
The water circuitry in the Control Unit is damaged.
- Solution3
-
Contact dealer.*
* Repairs cannot be made by the customer.
QHandpiece LED does not illuminate. (Varios 970 LUX) - TS21664
A
- Probable Cause1
-
Tip oscillates, but Handpiece LED turns on and off.
- Cause1
-
The handpiece is not connected into the Handpiece Cord correctly.
- Solution1
-
Firmly insert the handpiece into the Handpiece Cord inmost.
- Probable Cause2
-
Tip oscillates, but Handpiece LED does not turn on.
- Cause2
-
Disconnection in the Handpiece Cord, or failure in the Control Unit.
- Solution2
-
Contact dealer.*
* Repairs cannot be made by the customer.
QStart Beeping - TS21666
A
- Probable Cause1
-
Beeping while power on.
- Cause1
-
Depress Foot Control.
- Solution1
-
Release the Foot Control.
- Probable Cause2
-
Beeping while stopping vibration of Tips.
- Cause2
-
Abnormal heating of the Control Unit.
- Solution2
-
Stop the operation and leave until Control Unit becomes cool.
Varios 170
QNo / Poor vibration. - TS21675
A
- Item to Check
-
The Tip does not generate vibration, in spite of depressing the Foot Control.
- Cause1
-
The Tip is not tightened firmly.
- Solution1
-
Tighten the Tip until the Tip Wrench clicks.
- Cause2
-
Worn Tip.
- Solution2
-
Replace the Tip.
- Cause3
-
Power has not been correctly adjusted for the Tip.
- Solution3
-
Adjust the power level on the Power Guide or Tip case label.
Do not exceed the maximum indicated on the tip label.
- Cause4
-
Failure of vibrator in the handpiece.
- Solution4
-
Contact dealer.*
* Repairs cannot be made by the customer.
QThe Tip is bent or broken. - TS21679
A
- Cause
-
Power has not been properly adjusted for the Tip.
- Solution
-
Adjust the power level on the Power Guide or Tip case label. Do not exceed the maximum indicated on the tip label.
QThe Tip is flying away. - TS21681
A
- Cause
-
The Tip is not tightened firmly.
- Solution
-
Tighten the Tip until the Tip Wrench clicks.
QNoise from the handpiece. - TS21683
A
- Cause1
-
Power has not been properly adjusted for the Tip.
- Solution1
-
Adjust the power level on the Power Guide or Tip case label.
Do not exceed the maximum indicated on the tip label.
- Cause2
-
The Tip is not tightened firmly.
- Solution2
-
Tighten the Tip until the Tip Wrench clicks.
- Cause3
-
Failure of vibration in the handpiece or the Module.
- Solution3
-
Contact dealer.*
* Repairs cannot be made by the customer.
QThe handpiece is overheating. - TS21685
A
- Cause1
-
Power has not been properly adjusted for the Tip.
- Solution1
-
Adjust the power level on the Power Guide or Tip case label.
Do not exceed the maximum indicated on the tip label.
- Cause2
-
The Tip is not tightened firmly.
- Solution2
-
Tighten the Tip until the Tip Wrench clicks.
- Cause3
-
Failure of vibration in the handpiece or the Module.
- Solution3
-
Contact dealer.*
* Repairs cannot be made by the customer.
QNo / Weak water 1 - TS21687
A
- Item to Check
-
The water does not reach to the handpiece.
- Solution
-
Check the water circuitry and supply to the Unit Chair.
QNo / Weak water 2 - TS21689
A
- Item to Check
-
Remove the handpiece from the handpiece cord. Water does not come out or only a limited amount.
- Cause1
-
The water adjustment dial is closed.
- Solution1
-
Turn the water adjustment dial and set it to an appropriate water colume.
- Cause2
-
The water filter is clogged.
- Solution2
-
Contact dealer.*
* Repairs cannot be made by the customer.
QNo / Weak water 3 - TS21691
A
- Item to Check
-
No / Weak water from the handpiece.
- Cause
-
There may be exogenous material in the hole.
- Solution
-
Air it with the appliances such as syringes from the rear of the handpiece.
If it is still unsolved, contact dealer.
QWater leakage. - TS21693
A
- Item to Check
-
Water is leaking from the joint between the handpiece and the cord.
- Cause
-
O-Ring at the handpiece cord is worn or damaged.
- Solution
-
Apply air from an appliance such as a 3in1 syringe to the rear of the handpiece.
If it is still unsolved, contact dealer.
QHandpiece LED does not illuminate. (Varios 170 LUX) - TS21695
A
- Item to Check1
-
Tip oscillates, but Handpiece LED turns on and off.
- Cause1
-
The handpiece is not connected into the Handpiece Cord correctly.
- Solution1
-
Firmly insert the handpiece into the Handpiece Cord.
- Item to Check 2
-
Tip oscillates, but Handpiece LED does not turn on.
- Cause2
-
Disconnection in the Handpiece Cord, or failure in Module.
- Solution2
-
Contact dealer.*
* Repairs cannot be made by the customer.
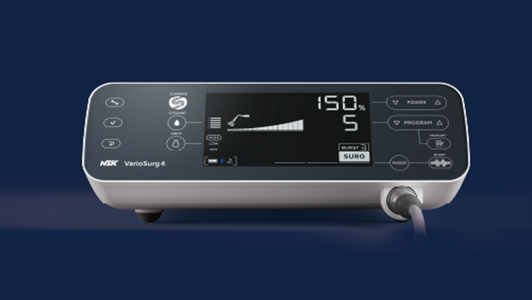
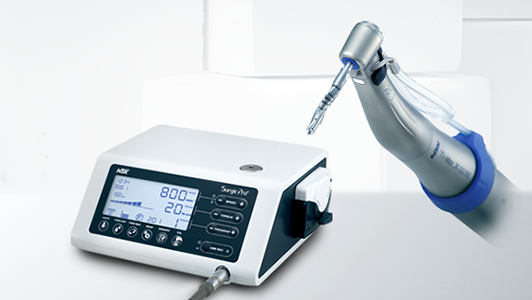
VarioSurg 4
QError Code: E0 – System error - TS24145
A
- Cause of error
-
Self-check error.
- Action
-
Request repair.
QError Code: E1 – Oscillator system error - TS24147
A
- Cause of error1
-
Tip is overloaded.
- Action1
-
Be careful not to overload the tip.
In the event of a situation where the tip is stuck in situe, step on the main pedal on the foot control and slowly pull out the tip while oscillating it (do not force it out).
- Cause of error2
-
Tip not mounted, tip not tightened
- Action2
-
Install the tip and tighten it with the tip replacement wrench until it "clicks" and idles.
- Cause of error3
-
Handpiece cord is not securely connected. Disconnection in the handpiece cord.
- Action3
-
Check the handpiece cord connection. If this does not resolve it, contact an authorized NSK dealer.
QError Code: E2 – Power supply error - TS24151
A
- Cause of error
-
Insufficient contact of the power cord.
Failure of the power supply circuit.
- Action
-
Securely re-connect the power cord.
If the error cannot be eliminated, request repair.
QError Code: E4 – Control unit interior overheating error - TS24153
A
- Cause of error
-
Overheating by extended use under heavy load.
Use immediately after the control unit is placed at high temperature (such as inside a car under the blazing sun or in a locker exposed to direct sunlight).
- Action
-
Allow it to cool down before use.
To allow heat to be sufficiently radiated, the periphery of the control unit should be well ventilated wherever possible.
If the error cannot be eliminated, request repair.
QError Code: E7 – Irrigation pump error - TS24155
A
- Cause of error
-
Irrigation tube caught on pump roller.
Irrigation pump failure.
- Action
-
Check the irrigation tube.
If the error cannot be eliminated, request repair.
QError Code: E8 – Connection error in the control unit - TS24157
A
- Cause of error
-
Failure of Bluetooth communication circuit (LED handpiece system) inside the control unit.
- Action
-
Request repair.
QError Code: E9 – Wireless foot control error - TS24159
A
- Cause of error
-
Failure of sensor in wireless foot control.
Detection of disconnection of Bluetooth communication during ultrasonic vibration.
- Action
-
Request repair.
QError Code: E10 – Handpiece connection error - TS24161
A
- Cause of error
-
Handpiece or tip not connected.
- Action
-
Check that the handpiece cord is securely connected or that the tip is securely connected using a tip wrench.
If not resolved, contact an authorized NSK dealer.
QError Code: E11 – Operation panel error - TS24163
A
- Cause of error
-
Abnormal control panel screen
- Action
-
Request repair.
QError Code: E12 – Connection error in the control unit - TS24165
A
- Cause of error
-
Failure of the Bluetooth communication circuit (link system with Surgic Pro2) inside the control unit.
- Action
-
Request repair.
QError Code: E13 – Wired foot control error - TS24167
A
- Cause of error
-
Failure of wired foot control.
- Action
-
Make sure the connector of the wired foot control is securely connected. If not resolved, contact an authorized NSK dealer.
QScreen is blank. - TS24169
A
- Cause of problem1
-
Plug improperly inserted to power
- Action1
-
Check to make sure the plug is in.
- Cause of problem2
-
Malfunction of power switch
- Action2
-
Request repair.
QThe power level and ” – – – ” are alternately displayed on LCD. - TS24171
A
- Cause of problem1
-
Power turned on while pressing the foot control
- Action1
-
Remove foot from foot control.
- Cause of problem2
-
Foot control malfunction
- Action2
-
If the problem is solved by removing the batteries, it is a foot control malfunction. If not, it is a control unit malfunction. Please contact an authorized NSK dealer.
- Cause of problem3
-
Control unit malfunction
- Action3
-
If the problem is solved by removing the batteries, it is a foot control malfunction. If not, it is a control unit malfunction. Please contact an authorized NSK dealer.
QAfter the power is ON, “CONNECT” or “PUSH FC” is displayed and the screen is not switched. - TS24173
A
- Cause of problem
-
Wireless foot control is not connected.
- Action
Keep pressing the main pedal of the wireless foot control while “PUSH FC” is displayed on the LCD.
If the screen does not change after 5 minutes, press the button below.

The normal screen is displayed.
Replace the wireless foot control batteries to check if it can be connected.
=> “3.2 Installing batteries (Only for wireless foot control)”.
If it cannot be connected after replacing the batteries, pairing the control unit and wireless foot control.
=> “7.2 Pairing with wireless foot control”.
If this does not resolve the issue, please contact an authorized NSK dealer.
QWill not vibrate even if the Wireless foot control is pressed. - TS24176
A
- Cause of problem1
-
Wireless foot control is not connected.
- Action1
-
Perform the following after confirming that nothing is blocking the signal between the wireless foot control and control unit.
・Turn the main power switch OFF, and ON again to connect to the control unit.
・Replace the wireless foot control batteries with new ones.
=> “3.2 Installing batteries (Only for wireless foot control)”.
・Perform pairing the control unit and wireless foot control.
=> “7.2 Pairing with wireless foot control”.
If this does not resolve the issue, please contact an authorized NSK dealer.
- Cause of problem2
-
Wireless foot control pedal and button
response is poor due to not being used
for a long period of time.
- Action2
-
Calibrate the foot control.
=> “6.2 Foot control calibration”.
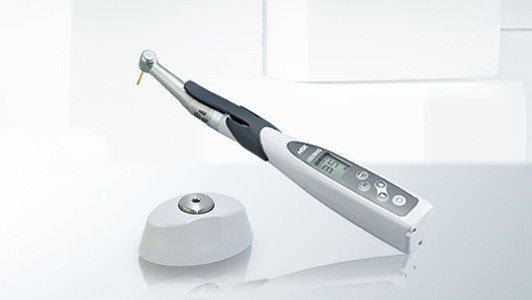
Surgic Pro2
QError code: E0 – System error - TS18135
A
- Cause of error
-
Self-check error.
- Action
-
Request repair.
QError code: E1 – Motor voltage / current detection error - TS18034
A
- Cause of error
-
Extended use under heavy load.
Short circuit in the motor.
Motor cord (power line) failure.
- Action
-
Electrical contact may be insufficient.
Securely re-connect the motor cord.
If the error cannot be eliminated, request repair.
QError code: E2 – Power supply error - TS18141
A
- Cause of error
-
Insufficient contact of the power cord.
Failure of the power supply circuit.
- Action
-
Securely re-connect the power cord.
If the error cannot be eliminated, request repair.
QError code: E3 – Motor sensor error - TS18139
A
- Cause of error
-
Motor sensor failure.
Unplugged motor cord.
Motor cord (signal line) failure.
Ingress of water into the motor.
- Action
-
Electrical contact may be insufficient.
Securely re-connect the motor cord.
If the error cannot be eliminated, request repair.
(Make sure to attach a protection plug when cleaning in a washer-disinfector.)
QError code: E4 – Control unit interior overheating error - TS18154
A
- Cause of error
-
Overheating by extended use under heavy load.
Use immediately after the control unit is placed at high temperature (such as inside a car under the blazing sun or in a locker exposed to direct sunlight).
- Action
-
Allow it to cool down before use.
To allow heat to be sufficiently radiated, the periphery of the control unit should be well-ventilated wherever possible.
If the error cannot be eliminated, request repair.
QError code: E5 – Breaking error - TS18160
A
- Cause of error
-
Abnormal voltage generated in the start / stop switch circuit.
Failure in the start / stop switch circuit.
- Action
-
When rotation and stop are repeated in a short period of time, a circuit to suppress the sudden acceleration at the start of rotation may be activated. Wait for a few seconds before use.
If the error cannot be eliminated, request repair.
QError code: E6 – Motor rotation failure error - TS18133
A
- Cause of error
-
Bur or drill attachment failure.
Handpiece failure.
Motor failure.
- Action
-
The chuck may still be open, or not sufficiently closed. Securely close the chuck.
If the error cannot be eliminated, request repair.
QError code: E7 – Irrigation pump error - TS18165
A
- Cause of error
-
Incorrectly fitted irrigation tubing caught in the pump roller.
Irrigation pump failure.
- Action
-
Check the irrigation tube.
If the error cannot be eliminated, request repair.
QError code: E8 – Bluetooth communication error - TS18163
A
- Cause of error
-
Failure of the Bluetooth communication circuit.
- Action
-
Request repair.
QError code: E9 – Foot control error - TS18137
A
- Cause of error
-
Failure of the foot control sensor (Hall IC).
Self-check error.
- Action
-
Request repair.
QError code: E10 – Motor LED error (Optic motor) - TS18159
A
- Cause of error
-
Adhesion of the saline solution to the motor LED.
Failure of LED circuit.
- Action
-
Remove the saline solution completely. If the error cannot be eliminated, request repair.
QError code: E11 – Control panel error - TS18169
A
- Cause of error
-
Failure of the LCD display driver.
Failure of the electrostatic sheet.
- Action
-
Request repair.
QError code: E12 – Link Module error - TS18156
A
- Cause of error
-
Failure of the link cable.
Failure of the Link Module circuit.
Failure of Bluetooth communication circuit in the Link Module.
- Action
-
Turn off the VarioSurg 3 and re-connect the Link Module securely. If the error cannot be eliminated, request repair.
QError code: E13 – Osseo 100+ error - TS18167
A
- Cause of error
-
Affected by electromagnetic interference emitted by electronic equipment.
Failure of Bluetooth communication circuit in Osseo 100+.
- Action
-
Keep sufficient distance between the tip of Osseo 100+ and electronic equipment. If the error cannot be eliminated, request repair.
QError code: E14 – External terminal error - TS21676
A
- Cause of error
-
OS of external terminal is not supported.
Failure of the external terminal.
- Action
-
Check the supported OS in the application. Also, reinstall the application. If the error cannot be eliminated, request repair.
QProblem: Screen is blank. - TS21718
A
- Cause of Problem1
-
Plug improperly inserted to power source
- Action1
-
Check to make sure the plug is in.
- Cause of Problem2
-
Malfunction of power switch
- Action2
-
Request repair.
QProblem: The maximum rotation speed and “–” are alternately displayed on the speed display. - TS21732
A
- Cause of Problem1
-
Power turned on while pressing the foot control
- Action1
-
Remove foot from foot control.
- Cause of Problem2
-
Foot control malfunction
- Action2
-
If the problem is solved by removing the batteries, it is a foot control malfunction. If not, it is a control unit malfunction.
Please contact an authorized NSK dealer.
- Cause of Problem3
-
Control unit malfunction
- Action3
-
If the problem is solved by removing the batteries, it is a foot control malfunction. If not, it is a control unit malfunction.
Please contact an authorized NSK dealer.
QProblem: After the power is ON, “CONNECT” or “PUSH FC” is displayed and the screen is not switched. - TS21734
A
- Cause of Problem
-
Foot control is not connected.
- Action
-
Keep pressing the speed control pedal of the foot control while “PUSH FC” is displayed on the LCD display. If the screen does not change after 5 minutes, press and hold the Cancel key. The normal screen is displayed.
See “4 – 2 Installing foot control batteries” and replace the foot control batteries to check if it can be connected.
If it cannot be connected after replacing the batteries, see “8 – 1 – 1 Pairing with foot control” for pairing.
If this does not resolve the issue, please contact an authorized NSK dealer.
QProblem: Will not rotate even if the foot control is pressed. - TS21736
A
- Cause of Problem1
-
Foot control is not connected.
- Action1
-
Perform the following after confirming that nothing is blocking the signal between the foot control and control unit.
• Turn the main unit power off and on again to connect to the control unit.
• See “4 – 2 Installing foot control batteries” and replace the foot control batteries with new ones.
• See “8 – 1 – 1 Pairing with foot control” and perform pairing.
If this does not resolve the issue, please contact an authorized NSK dealer.
- Cause of Problem2
-
Foot control pedal and button response is poor due to not being used for a long period of time.
- Action2
-
See “7 – 3 Foot control calibration” and calibrate the foot control.
- Cause of Problem3
-
Malfunction of control unit or foot control
- Action3
-
If the problem is not solved by checking foot control batteries or foot control connection status, system repair is required.
QProblem: “COM ERR FC” is displayed. - TS21739
A
- Cause of Problem
-
Foot control not connected
- Action
-
Press the Cancel key to cancel the error. After confirming that nothing is blocking the signal between the control unit and the foot control, wait for a while to check if the foot control is connected automatically. If it is not connected automatically, perform the following procedures.
• Turn the control unit power off and on again to connect to the foot control.
• See “4 – 2 Installing foot control batteries” and replace the foot control batteries with new ones.
• See “8 – 1 – 1 Pairing with foot control” and perform pairing.
If this does not resolve the issue, please contact an authorized NSK dealer.
QProblem: “COM ERR LK” is displayed. - TS21741
A
- Cause of Problem
-
Link Module not connected
- Action
-
Press the Cancel key to cancel the error. After confirming that nothing is blocking the signal between the control unit and the Link Module, wait for a while to check if the Link Module is connected automatically. If it is not connected automatically, perform the following procedures.
• Turn off and on both Surgic Pro2 and VarioSurg 3 connected to Surgic Pro2.
• See the Link Module manual and try the pairing again.
If this does not resolve the issue, please contact an authorized NSK dealer.
QProblem: “COM ERR OS” is displayed. - TS21743
A
- Cause of Problem
-
Osseo 100+ not connected
- Action
-
Press the Cancel key to cancel the error. After confirming that nothing is blocking the signal between the control unit and Osseo 100+, wait for a while to check if Osseo 100+ is connected automatically. If it is not connected automatically, perform the following procedures.
• Turn off and on both Surgic Pro2 and Osseo 100+ connected to Surgic Pro2.
• Charge the battery sufficiently with the Osseo 100+ charger and try the automatic connection again.
• See the Osseo 100+ manual and try the pairing again.
If this does not resolve the issue, please contact an authorized NSK dealer.
QProblem: “BATTERY FC” is displayed. - TS21745
A
- Cause of Problem
-
Foot control battery is low
- Action
-
Depress the speed control pedal of the foot control or press the Cancel key to cancel the error.
Replace the batteries.
If this does not resolve the issue, please contact an authorized NSK dealer.
QProblem: “BATTERY OS” is displayed. - TS21747
A
- Cause of Problem
-
Osseo 100+ battery is low
- Action
-
Depress the speed control pedal of the foot control or press the Cancel key to cancel the error.
Charge the battery sufficiently with the Osseo 100+ charger and try the automatic connection again.
If this does not resolve the issue, please contact an authorized NSK dealer.